Teams can be used to organize incoming conversations. A team consists of one or more agents who have access to one or more channels. Besides assigning an agent to a conversation, you can also assign a team to a conversation.
On this page you have the following options:
This is only possible with the appropriate permissions
Only administrators can create and manage teams
Overview Teams
The Overview section provides a list of all teams in your account. You can use the search bar to find a specific team quickly.
Clicking on a team in the list reveals the following.
- Delete: here you can delete a team.
- Edit: edit the details, stickiness, notifications, routing, channels and agents. These are the same options as when you add an agent. Read more under the head Add Teams.
- Overview: you see the details of a team, which agents are linked to a team and which channels.
- Business hours: here you can find the details of the business hours. If you want to edit the business hours you will be redirected to Business hours under Settings.
- Automated messages: here you see if the automated messages are enabled. Automated messages are sent when the bot is online and offline. If you want to change the content of the automated messages you will be redirected to Business hours under Settings.
Add Teams
Click on the button +Add in the module Teams to add a team.
A new window will open:
You will see six steps:
1. Details
Fill in the name of the team and optional a reference. You can also upload a photo or use a color.
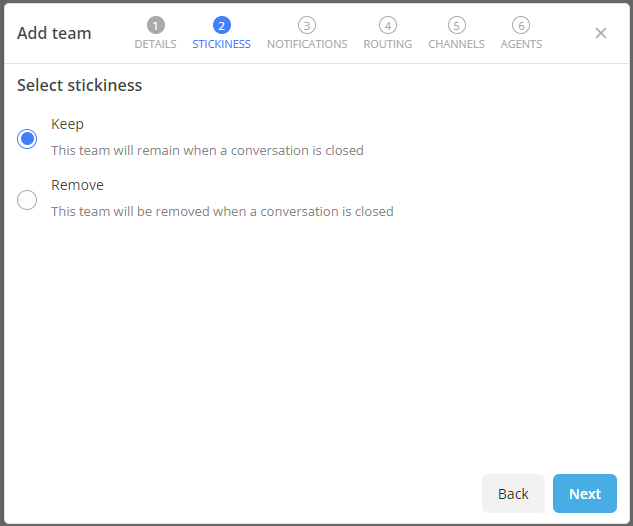
2. Stickiness
You can choose whether the team should remain assigned when the conversation is closed or removed. Keep sticky means when someone responds again then it is reassigned to the same team.
3. Notifications
You can indicate if you want to receive an email notification as soon as a new
conversation is assigned to this team.
4. Routing
In this step, it is possible to automatically assign the team to a conversation as soon as the Google Id or a phone number is recognized.
5. Channels
Specify which channels have access to this team. This way you can unlock certain channels from teams or just give access to a team.
6. Agents
In the last step, you specify which agents have access to the team. Use the search function to find agents.
Click on Save.